Spring Framework 시작하기(3)
1. Enviroment profile
이번 시간에는 Application 속성 관리를 Spring에서 어떻게 하는지 살펴보자.
- Application Context에서 제공하는 중요 기능 중 하나이다.
- EnvironmentCapable 인터페이스를 제공한다.
//EnvironmentCapable.class
package org.springframework.core.env;

public interface EnvironmentCapable {
	Environment getEnvironment();
}- 어플리케이션이 처한 상황과 공간을 말하는 것이다.
- 개발 중 : 개발환경
테스트 중 : 테스트 환경
운영 중 : 운영 환경 - IoC Context에서는 무슨 요인을 주는 환경이 존재할까?
-> Bean 에게 어떤 영향을 주는 무언가
개발 중에는 H2 DB를 사용하도록 Bean이 등록된다.
-> DataSource에 Connection 대상이 H2 Database 이다.
운영 중에는 MySQL로 다시 바꾼다.
-> DB가 바뀜 == 환경이 바뀐다.
- profile, property가 바뀐다.
Properties
: 어플리케이션을 개발하다 보면 DB 접속정보, 서버 호출정보 등 다양한 정보를 어플리케이션 속성으로 정의
- 코드 상에 정의하면 배포 시에 계속 변경해야 함
- 보안 상 코드에 노출 시키면 안됨
-> 외부로 빼서 읽어오게 한다.
- 많은 곳에 정의될 수 있음(file, jvm system file, os level 환경변수)
- 속성을 객체로 정의해서 사용할 때도 있다. (단위 테스트)
- resource -> application.properties
version = v1.0.0

kdt.version = v1.0.0

kdt.support_vendors = a, b, c, d

kdt.minimum-order-amount = 1
properties를 어노테이션하자.
// AppConfiguration.java

@Configuration
@ComponentScan(
	basePackages = {"org.prgrms.kdt.order"}
)
@PropertySource("application.properties")
public class AppConfiguration {
}
// OrderTester.java
public class OrderTester {
public static void main(String []args) {
var applicationContext = new AnnotationConfigapplicationContext(AppConfiguration.class);
var environment = new applicationContext.getEnvironment();
var version = environment.getProperty("kdt.version");
var minimumOrderAmount = environment.getProperty("kdt.minimum-order-amount", Integer.class);
var support = environment.getProperty("kdt.support-vendors", List.class);
var customerId = UUID.randomUUID();
var voucherRepository = applicationContext.getBean(VoucherRepository.class);
var voucher = voucherRepository.insert(new FixedAmountVoucher(UUID.randomUUID(), 10L));
var orderService = applicationContext.getBean(orderService.class);
var orderItems = new ArrayList<orderItem>() {{
add(new OrderItem(UUID.randomUUID(), 100L, 1));
}};
var order = orderService.createOrder(customerId, orderItems, voucher.getVoucherId());
Assert.isTrue(order.totalAmount() == 90L, MessageFormat.format("{0} is not 90L", order.totalAmount()));
}
}
value annotation을 사용하면 값을 field에 주입시킬 수 있다.
//OrderProperties.java

import org.springframework.stereotype.Component;

@Component
public class OrderProperties implelments InitializingBean {
	@Value("v1.1.1")
    // @Value("${kdt.verson}")
	private String version;	// 생성자로 값을 할당하지 않아도 됨

    @Value("0")
	private Integer minimumOrderAmount;		// Default : null

    @Value("d, a, b")
	private List<String> supportVendors; 	// Default : null

    @Value("${JAVA_HOME}")
    private String javaHome;

    @Override
    public void afterPropertiesSet() throws Exception {
    	// Bean을 등록하지 않고 바로 확인할 수 있다.
        // 디버깅
    }
}
- 없는 key를 전달한다면 key 값 자체가 value로 들어가게 된다.
@Value("${kdt.verson:v0.0.0}") // : 다음은 디폴트 값이다.
- 시스템 환경 변수를 쓸 수는 없을까? key 값을 쓸 수 있다.
- 시스템 환경 변수가 더 우선순위가 높다. (파일 환경보다)
클래스로 환경을 지정할 수 있다.
//VersionProvider.java

@Component
@PropertySource("version.properties")
public class VersionProvider {
	private final String version;

    public VersionProvider(@Value("${version:v0.0.0}")String version) {
    	this.version = version;
    }

    public String getVersion() {
    	return version;
    }

}
@Service
public class OrderService {
private final VoucherService voucherService;
private final OrderRepository orderRepository;
private final VersionProvider versionProvider;
public OrderService(VoucherService voucherService, OrderRepository orderRepository, VersionProvider versionProvider) {
this.voucherService = voucherService;
this.orderRepository = orderRepository;
this.versionProvider = versionProvider;
}
public Order createOrder(UUID customerId, List<OrderItem> orderItems) {
var order = new Order(UUID.randomUUID(), customerId, orderItems);
orderRepository.insert(order);
return order;
}
public Order createOrder(UUID customerId, List<OrderItem> orderItems, UUID voucherId) {
// setter가 없으니까 바꾸지 못한다.
versionProvider.getVersion();
var voucher = voucherService.getVoucher(voucherId);
var order = new Order(UUID.randomUUID(), customerId, orderItems);
orderRepository.insert(order);
voucherService.useVoucher(voucher);
return order;
}
}
2. YAML로 Properties 작성
- "YAML은 마크업 언어가 아니다 (YAML Ain't Markup Language)”
- Yet Another Markup Language
- 핵심은 문서 마크업이 아닌 데이터 중심
- 특정한 객체의 형태를 직렬화
// application.yaml
kdt:
  version: "v1.0"
  minimum-order-amount: 1
  support-vendors:
  	- a
    - b
    - c
    - d
  description: |-
  	line 1 hello world
    line 2 xxx
    line 3
스프링 부트는 yaml을 지원하지만 스프링 프레임워크는 yaml을 지원하지 않는다.
factory로 구현해야 한다.
// AppConfiguration.java

@Configuration
@ComponentScan(
	basePackages = {"org.prgrms.kdt.voucher", "org.prgrms.kdt.configuration"}
)
@PropertySource(value="application.yaml", factroy=YamlProperitesFactory.class)
public class AppConfiguration {}
// YamlProperitesFactoryBean.java
public class YamlProperitesFactory implements PropertySourceFactory{
@Override
public PropertySource<?> createPropertySource(String s, EncodeResource encodeResource) throws IException {
var yamlPropertyiesFactroyBean = new YamlPropertiesFactoryBean();
yamlPropertiesFactoryBean.serResouces(encodeResource.getResource());
var properties = YamlPropertiesFactoryBean.getObject();
return new PropertiesPropertySource(encodeResource/getResource().getFilename(), properties);
}
}큰 프로젝트일 때에는 속성이 다양하기 때문에 그룹화를 시킨다.
DB, Server, API 등등
3. Profile
: 특정한 특징이나 공통점을 찾아서 그룹화된 것을 의미한다.
- 설정이나 Bean을 그룹화해서 하나의 Profile로 정의할 수 있다.
- 예를 들어, 환경별로 그룹화한다.(로컬, 운용환경, dev 등)
- @Profile("local")
public class OrderTester {
	public static void main(String []args) {
    	var applicationContext = new AnnotationConfigapplicationContext();
        applicationContext.register(AppConfiguration.class);
        var environment = applicationContext.getEnvironment();
        environment.setActiveProfiles("dev");
        applicationContext.refresh();


        var customerId = UUID.randomUUID();
        var voucherRepository = applicationContext.getBean(VoucherRepository.class);
        var voucher = voucherRepository.insert(new FixedAmountVoucher(UUID.randomUUID(), 10L));

        var orderService = applicationContext.getBean(orderService.class);
        var orderItems = new ArrayList<orderItem>() {{
        	add(new OrderItem(UUID.randomUUID(), 100L, 1));
        }};
        var order = orderService.createOrder(customerId, orderItems, voucher.getVoucherId());
        Assert.isTrue(order.totalAmount() == 90L, MessageFormat.format("{0} is not 90L", order.totalAmount()));
    }
}
yaml 파일도 profile에 의해서 동작하도록 코드를 짤 수 있다.
// application.yaml

// 공통적으로 사용하는 서버 동작
servers:
  - dev.bar.com
  - foo.

---

spring.config.activate.on-profile: local

kdt:
  version: "v1.0"
  minimum-order-amount: 1
  support-vendors:
  	- a
    - b
    - c
    - d
  description: |-
  	line 1 hello world
    line 2 xxx
    line 3

---

spring.config.activate.on-profile: dev

kdt:
  version: "v1.0"
  minimum-order-amount: 1
  support-vendors:
  	- dev-a
    - dev-b
  description: |-
  	line 1 hello world
    line 2 xxx
    line 3
spring.config.activate.on-profile: local 은 스프링 부트에서 지원하는 기능이다.
4. Resource
- 스프링 어플리케이션을 만들다보면 외부 리소스를 읽는 경우가 있다.
* 외부리소스 종류
- 이미지 파일
- 텍스트 파일
- 암복호화 키파일 등
다양한 곳에서 가져올 수 있다.(file system, class path, url...)
- 호출할 API가 모두 다르다.
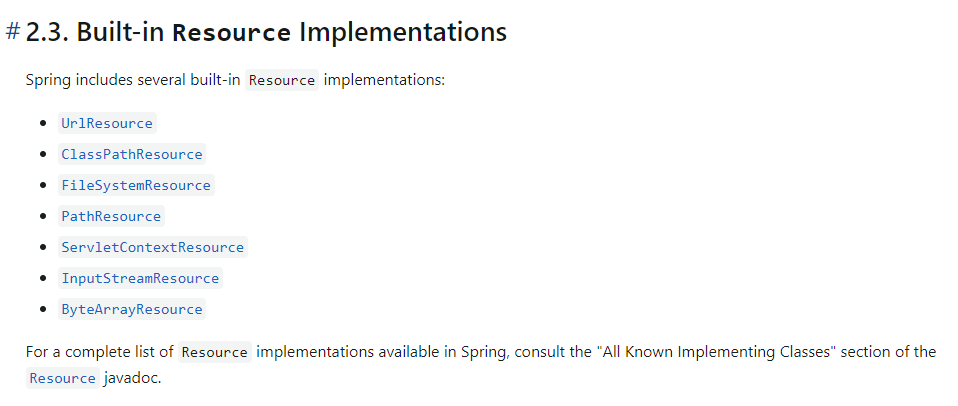
스프링은 Resource와 ResourceLoader 인터페이스를 제공한다
- Resource는 다양한 구현체를 제공해준다.
모든 Application context가 ResourceLoader 인터페이스를 구현하고 있다.
=> 모든 Application context에서 Resource 객체를 가져올 수 있다.
// OrderTester.java
public class OrderTester {
	public static void main(String []args) throws IOEception {
    	var applicationContext = new AnnotationConfigapplicationContext();

        // file resource
    	var resource = applicationContext.getResource("application.yaml");		// class path에서 가져오기
        var file = resource.getFile();
        var strings = Files.readAllLines(file.toPath());		//전체 읽기 List
        System.out.println(strings.stream().reduce("", (a, b) -> a + "\n" + b));

        // url resource
    	var resourceURL = applicationContext.getResource("https://stackoverflow.com/");
        var readableByteChannel = Channels.newChannel(resourceURL.getURL().openStream());
        new BufferedReader(Channels.newChannel(readableByteChannel, StandardCharsets.UTF_8));
        var contents = bufferedReader.lines().collect(Collectors.joining("\n"));

        var customerId = UUID.randomUUID();
        var voucherRepository = applicationContext.getBean(VoucherRepository.class);
        var voucher = voucherRepository.insert(new FixedAmountVoucher(UUID.randomUUID(), 10L));

        var orderService = applicationContext.getBean(orderService.class);
        var orderItems = new ArrayList<orderItem>() {{
        	add(new OrderItem(UUID.randomUUID(), 100L, 1));
        }};
        var order = orderService.createOrder(customerId, orderItems, voucher.getVoucherId());
        Assert.isTrue(order.totalAmount() == 90L, MessageFormat.format("{0} is not 90L", order.totalAmount()));
    }
}
- file path가 기준이라면 working directory를 기준으로 가져온다.
'2023 활동 - 4학년 > [1월 ~ 4월] sw 아카데미 백엔드 과정' 카테고리의 다른 글
| [2023.03.02 / CNU SW 아카데미] SpringBasic Part1 D-20 (0) | 2023.03.02 |
|---|---|
| [2023.03.02 / CNU SW 아카데미] 41일차 회고록 (0) | 2023.03.02 |
| [2023.02.28 / CNU SW 아카데미] 40일차 회고록 (2) | 2023.02.28 |
| [2023.02.27 / SW CNU 아카데미] SpringBasic Part1 D-18 (0) | 2023.02.27 |
| [2023.02.27 / CNU SW 아카데미] 39일차 회고록 (0) | 2023.02.27 |


